Mum’s quite sensitive to air quality: she struggles with smoke during bushfire season, and pollen or dust at other times of the year. Declining air quality isn’t always as visually obvious as smoke, so an early warning for changing conditions helps. We want to know to close the house up before the indoor air quality gets compromised. When the outdoor air quality improves, we want to know that it’s the right time to open the house up.
My parents live in a rural setting, so for this type of thing we really need to source our own local data, rather than just looking at a region-wide feed.
🎁 Today’s electronics project: an air quality monitor.
One for inside, and one for outside. USB-powered. Wi-Fi connected.
The Sensor
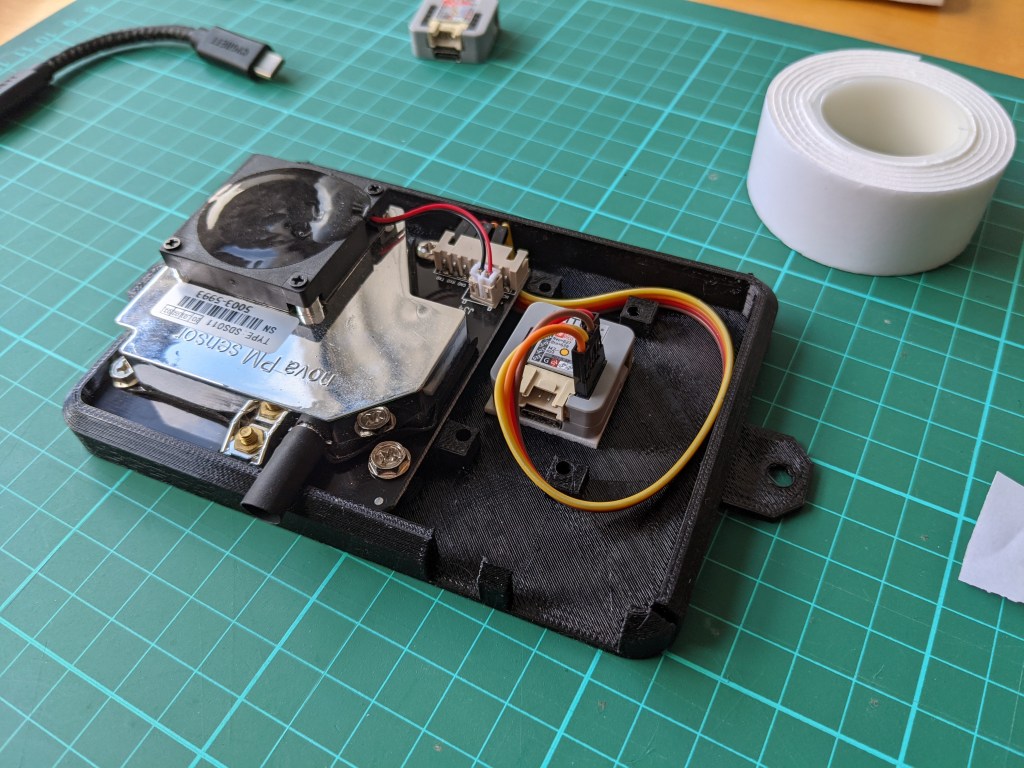
We’re interested in measuring particulate matter, like ash and pollen suspended in the air, as opposed to gas mix. The go-to sensor for this is a Nova PM SDS011. The sensor comes mounted on its own PCB, around 5cm square, with an integrated fan.

Every few minutes, the sensor fires up the fan on top, and sucks a sample of air from the intake tube you can see top-left, into the metallic box area.
Inside this box, it shoots a laser through the air, and then measures the scattering of the laser.
From this, it can determine the concentration of different sizes of suspended particles in the air.

They’re readily available on AliExpress for ~AU$25, and have good software support.
We had a prototype running for a good year or more, and it was working well, but we were overdue with boxing it up nicely.
The Case
First up, we needed a case. Gone are the days of the generic project box from Jaycar, but this is my first foray into 3D printing.
https://www.thingiverse.com/ > Search > SDS011 found lots of existing designs, for this exact scenario. Wunderbar.
I ended up picking this design, by @sumpfing. There’s a “tip the designer” option in Thingiverse, but unfortunately she doesn’t have this enabled, so all I can do is say “Dankeschön!” a few times.

It includes space for a DHT22 temperature/humidity sensor as well, in that square breakout back-right. It supports mounting for outdoor, and will happily sit on a shelf for indoor.
From Thingiverse, I was able to just download the design as a collection of STL files.
Rather handily, Windows 10 has native preview support for STL files. 💪 You can just double click the files and get an interactive preview without any additional software.

For extra bonus points, open the file in “Paint 3D” (also built-in to Windows 10), then hit Mixed Reality mode.
You can drop the model straight on to the workbench next to the real sensor. This was a really handy way to get a sense of scale, and how the pieces would ultimately go together.

At this point, I’m sold on the design, but I don’t own a 3D printer. I have no interest in owning, calibrating, or maintaining a printer. Zilch.
To the internet! Some quick Googling led me to Craftcloud, which provides a great marketplace experience.
You start off by uploading the STL files, and they generate a whole stack of quotes based on different materials, finishes, and operators from around the world.
So … will this case be brass, maraging steel, or titanium? 🤔
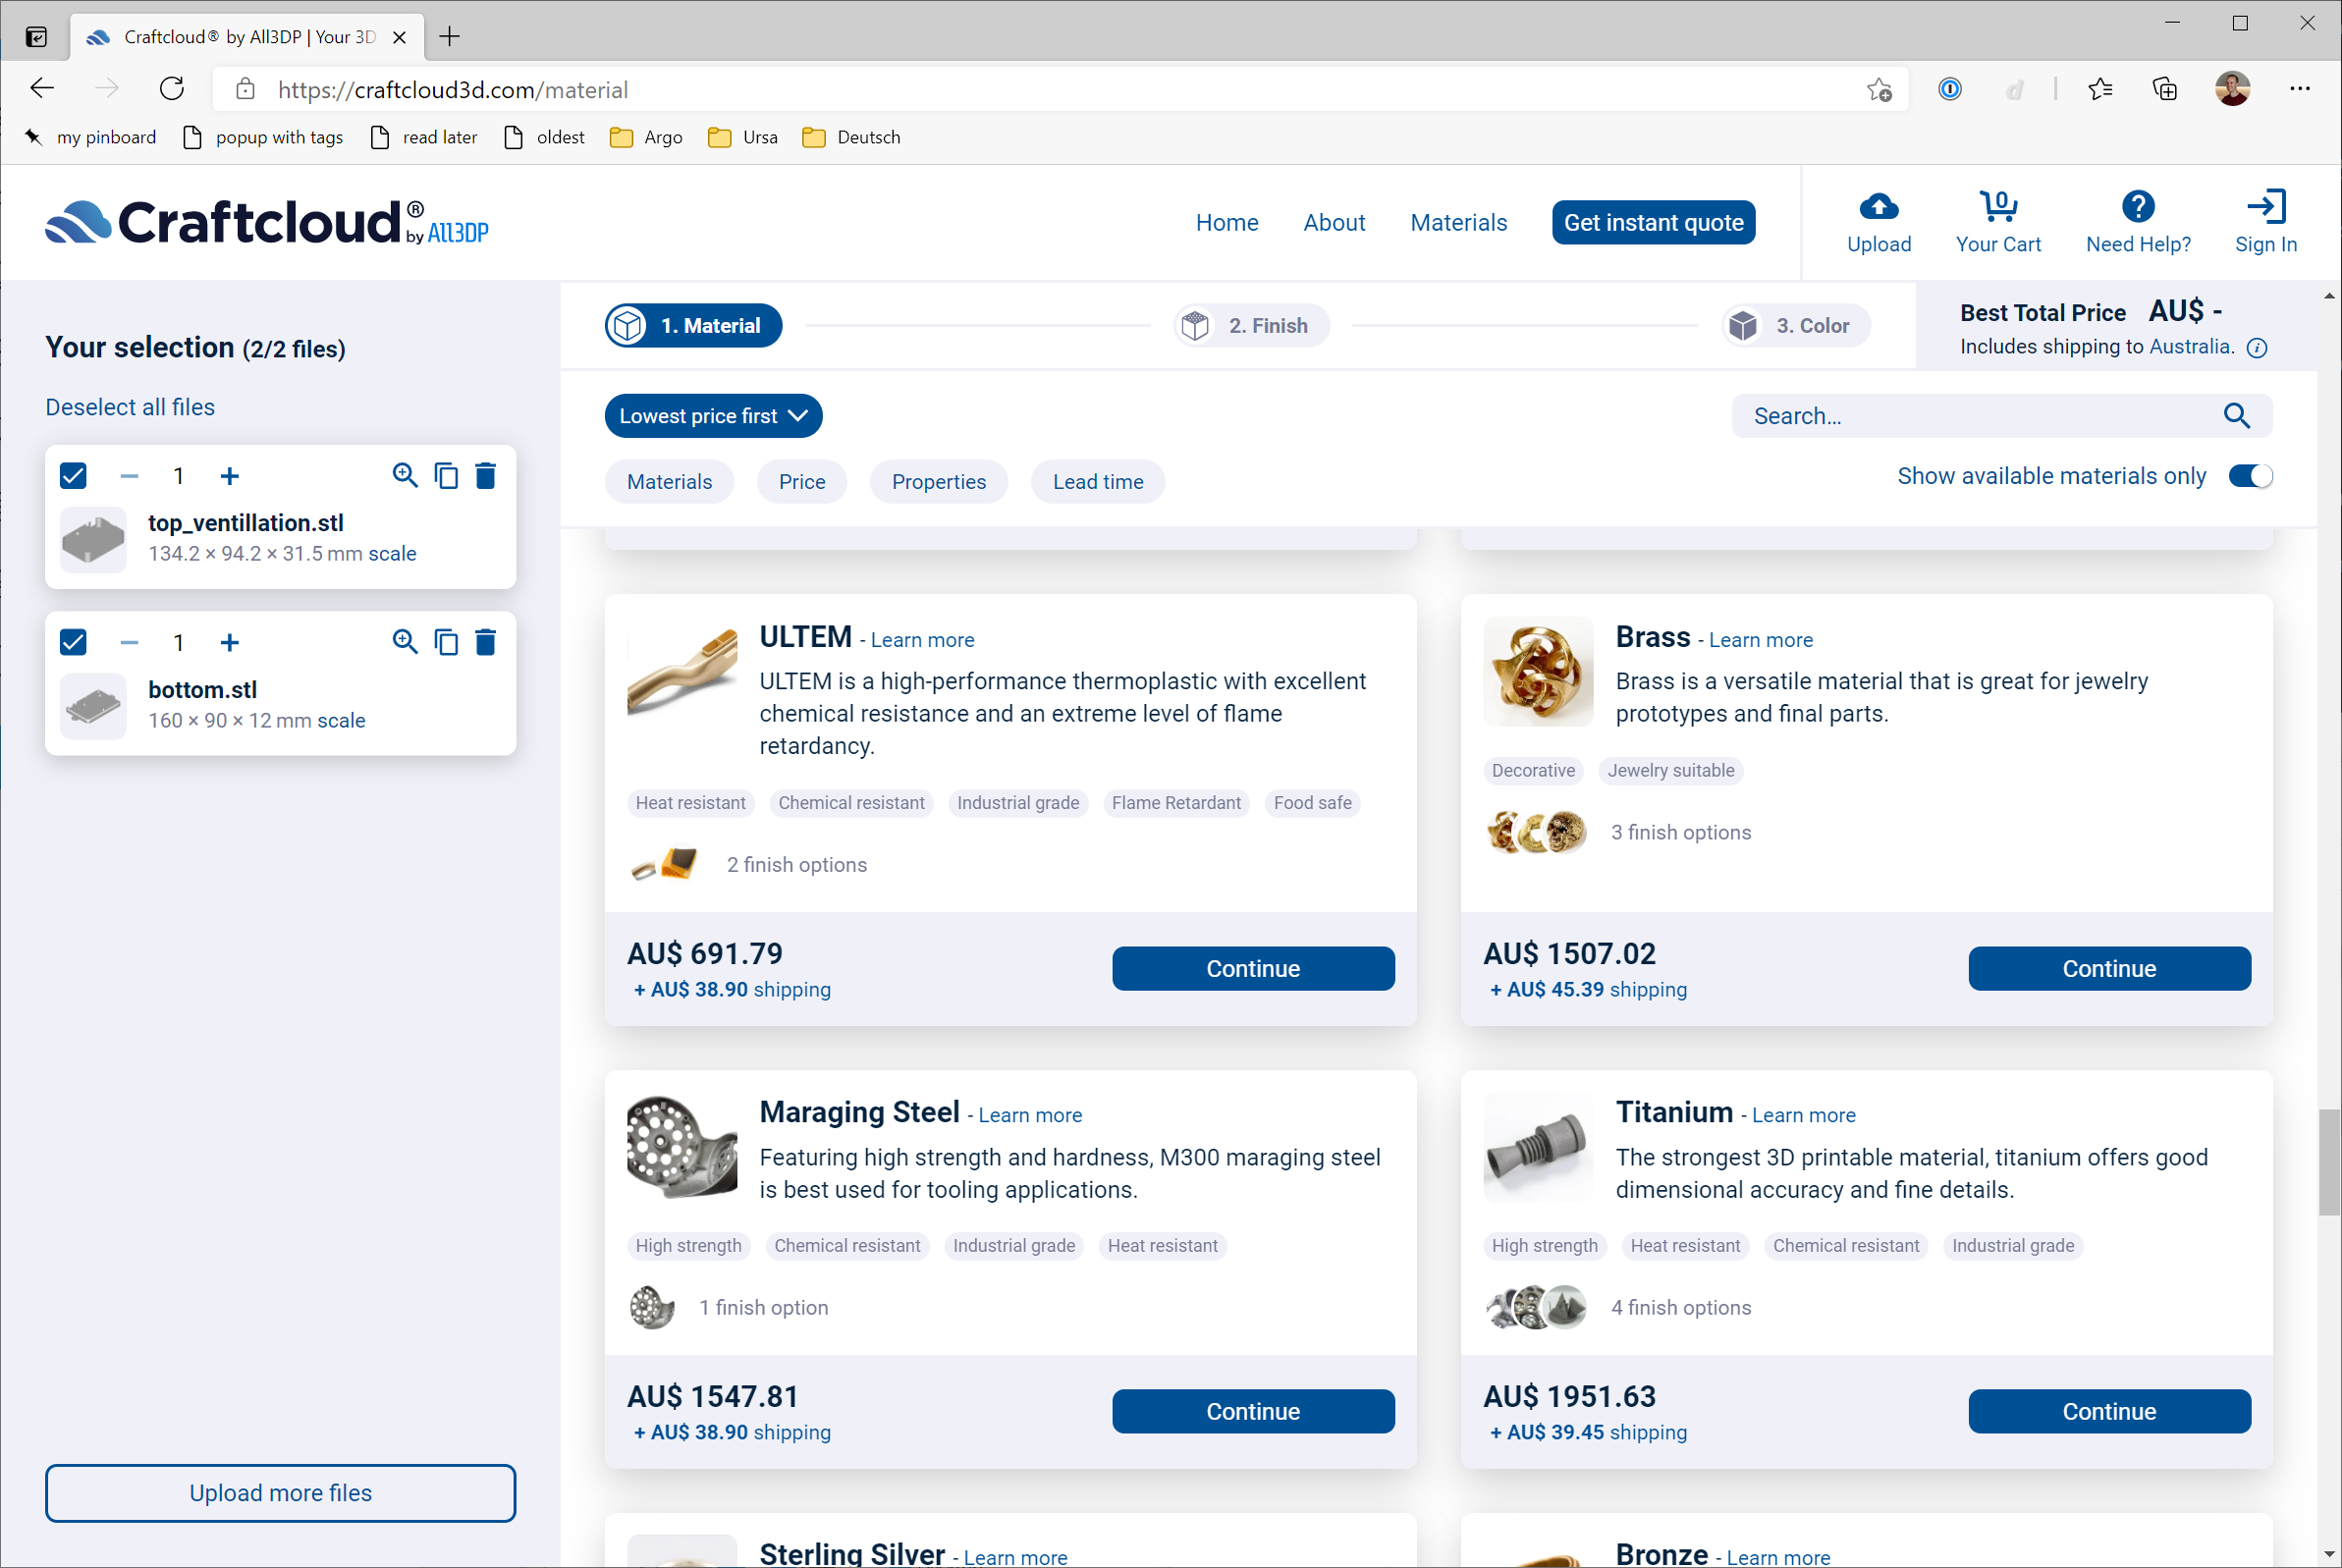
I took the wild choice, and opted for cheaper black plastic. Specifically, something called PETG. I have no idea if that was the best choice or not, but it sounded versatile enough. I also chose a local, Melbourne-based printer, offering a 6-8 day turnaround.
No doubt I can optimise this purchase path in future, but Craftcloud earnt their money here for ease of access for a first-timer. I spent $46 on the case, and then nearly half again to ship it three suburbs.

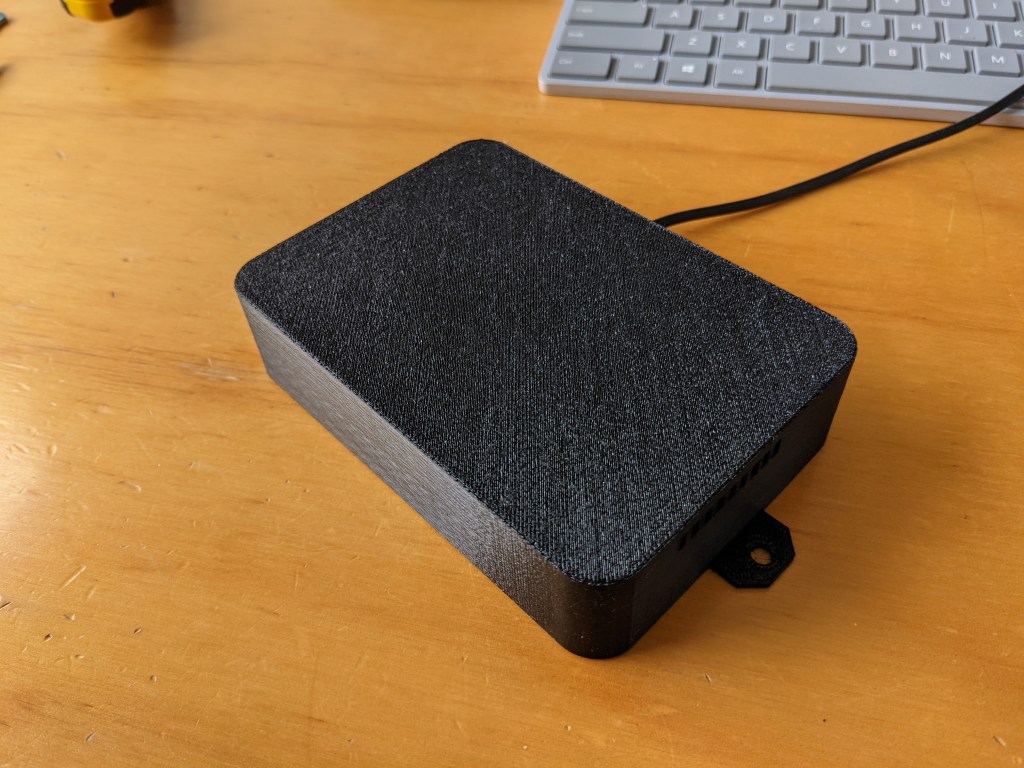
A few days later, we have a case! 🥳📬
The top section snaps on snugly.
The particulate sensor fits perfectly.
It’s black plastic.
Satisfied Tatham.


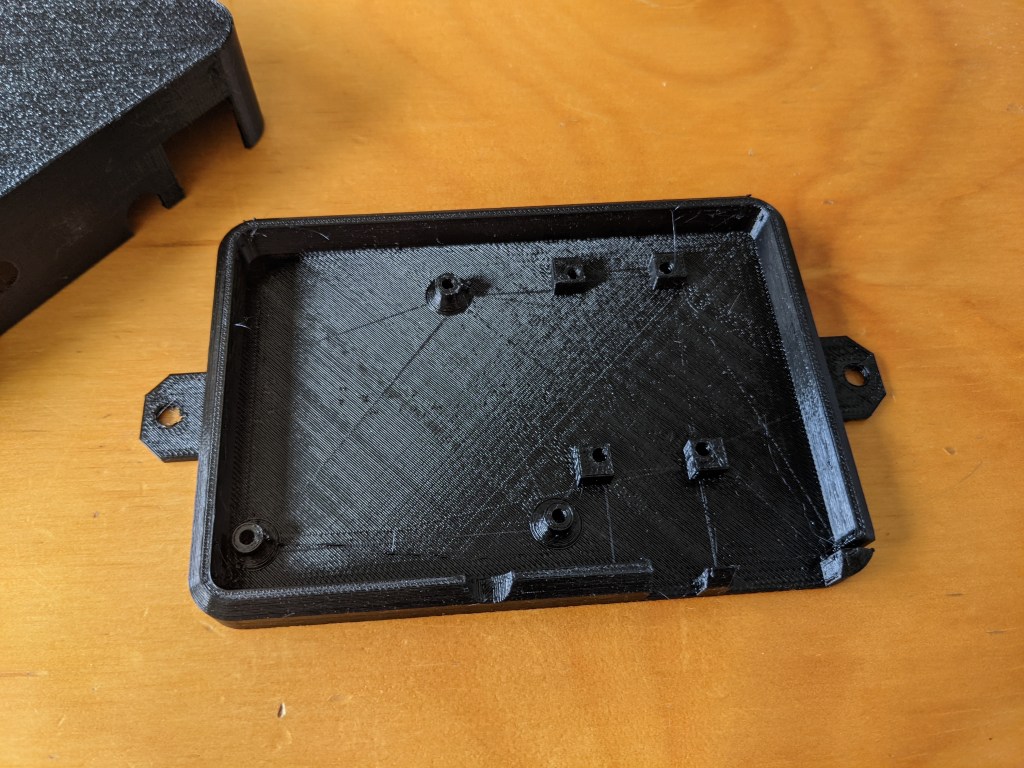
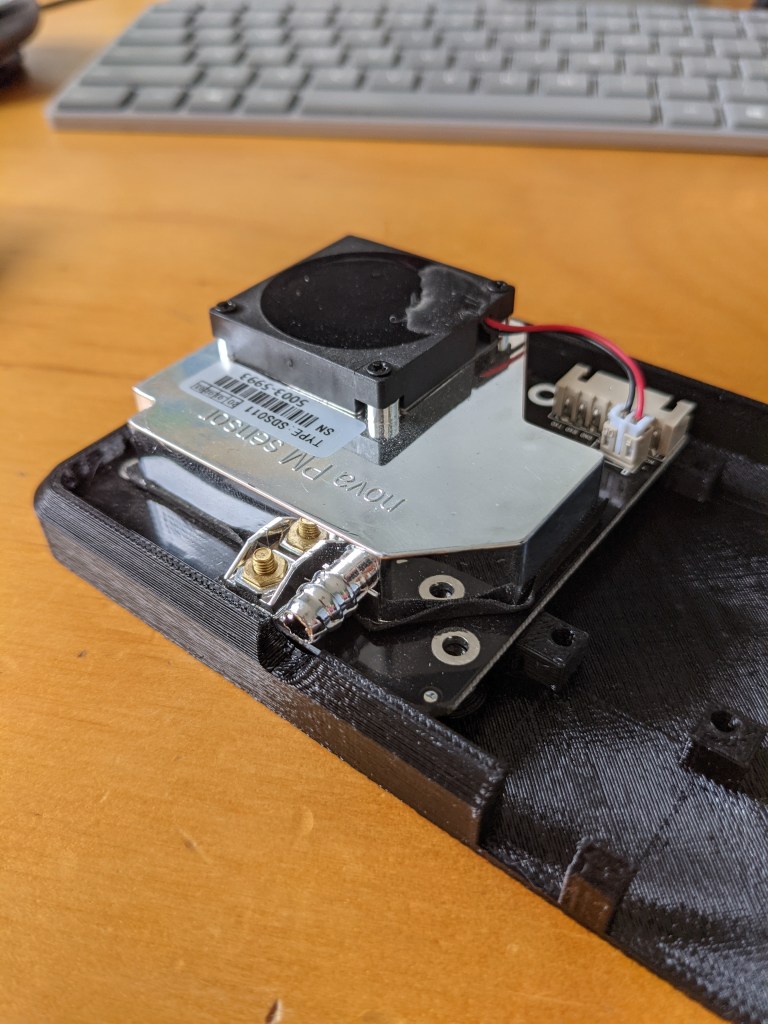
The sensor pops right into place, and anchors in easily with three screws. These are just random left over PC tower screws, probably from old hard drive mounts or something. I have a whole ziplock bag of them and they’re endlessly useful.

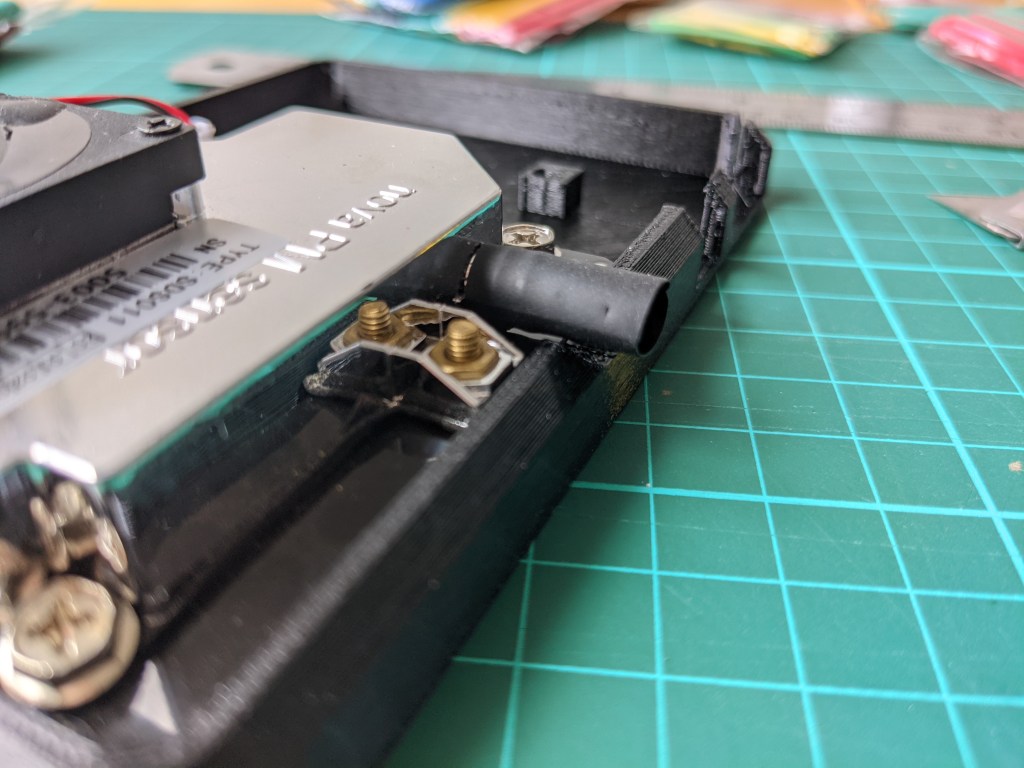
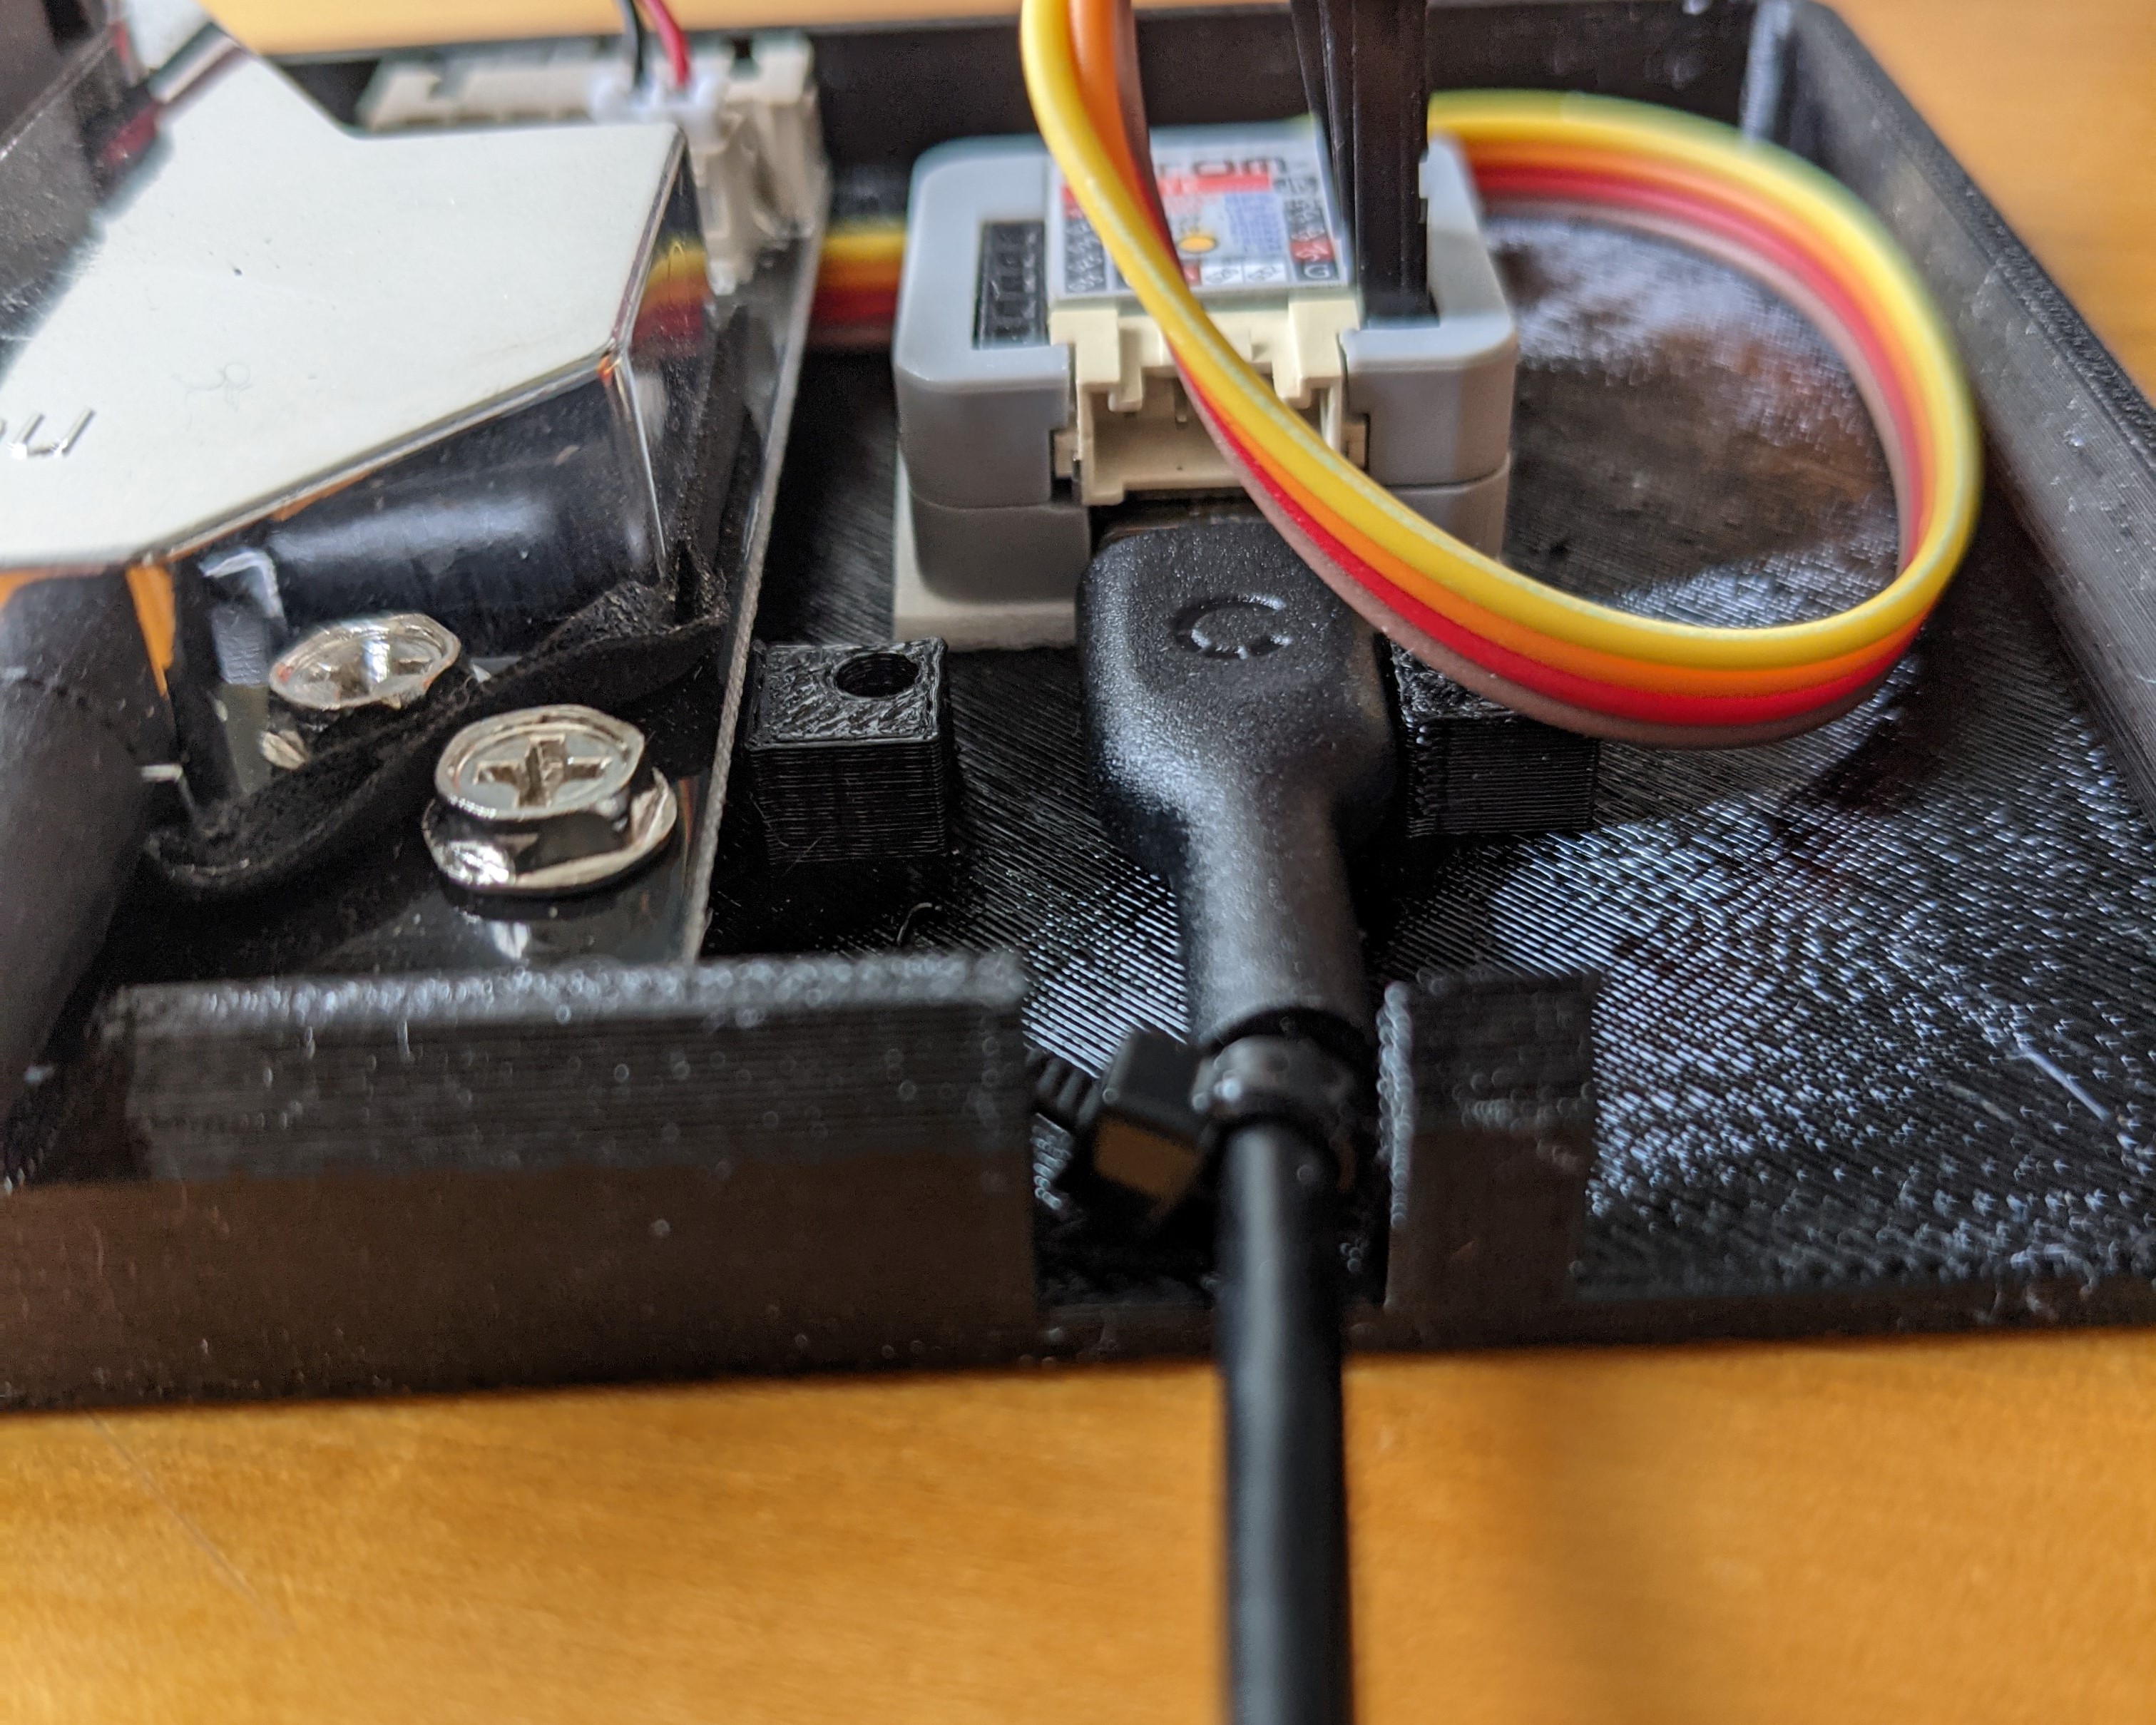
The intake tube is a bit short when the top of the case is popped on. I’m worried that it’ll suck air from inside the case, which would have it contaminated by its own exhaust.
This is easily fixed with a short section of heatshrink to the rescue, just slipped on (not actually heated).


For the compute + Wi-Fi module, it’s a trusty M5Stack Atom Lite, for ~AU$10.
I’m obsessed with these devices. Obsessed.
I’ve written about why previously.
With the M5Stack, there’s no soldering required: just 4x Dupont jumpers for power + data (UART).
I put some double-sided tape under it to hold it in place. Fancy. Imagine if I’d picked brass for the case, then used double-sided tape inside.
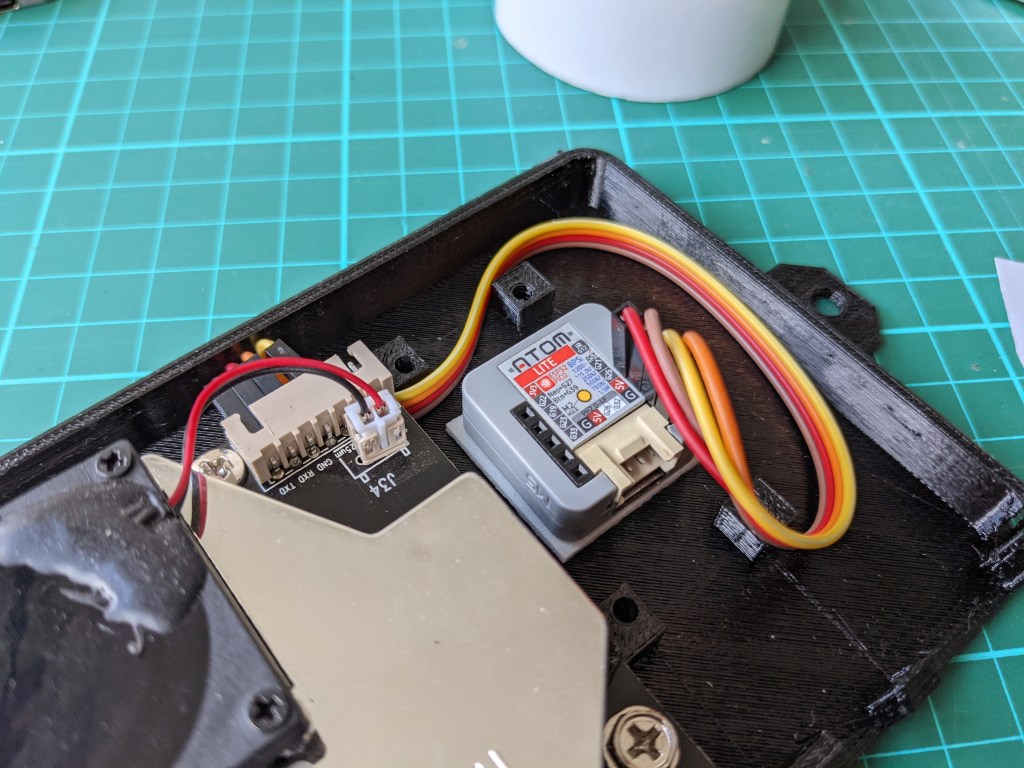

For power, I plug a cheap USB-C cable into the M5Stack.
In case it gets a yank, I put a cable tie around it and tuck the tail under the sensor.
It’s not anchored to anything, but you’d have to give it a serious yank to pull it through. It’s not going to fall out easily.
That’s all of the physical aspects done for now.
(The DHT22 temperature + humidity sensor will mount into that final space on the right, but it’s still in the mail.)
The top of the case just pops on with a little pressure.
This can now subtly sit on a shelf, or be mounted under an eave outside.

The Software
Time for some software.
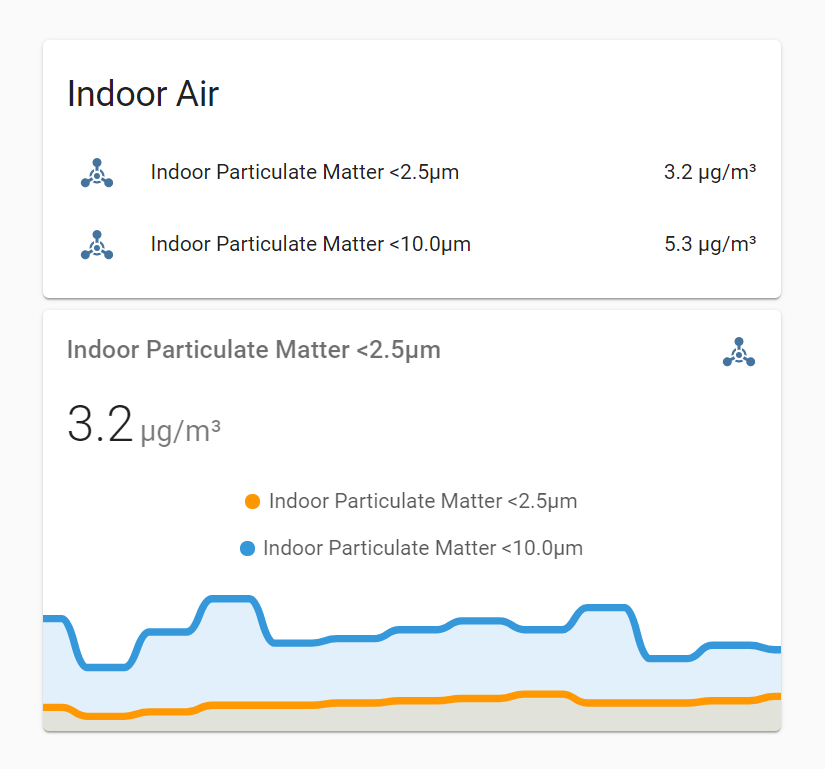
Thanks to ESPHome, it’s only 58 lines to get it connected to my Wi-Fi and have each particulate concentration (<2.5µm, <10.0µm) reported every 5 mins. Bonkers, but true.
It takes me ~15mins to create and deploy this firmware.
If you’re not familiar with ESPHome, I’d encourage you to check out my previous post: ESPHome: Nothing-to-firmware in 30mins.
The Result
We now have particulate matter concentration showing in @HomeAssistant. 🥳🎉
From here we need to:
- Add the DHT22 temperature and humidity sensor when it arrives, to complete the build.
- Build a second box for outside, so we can decide when to seal-up vs. air-out the house, based on indoor/outdoor differences.
- Trigger a push notification when particulate-matter is increasing, to say ‘close up the windows now’.
PS. This project was originally shared on Twitter. Jump over there for the discussion.

You must be logged in to post a comment.